
Complete Tile Roof Reinstallation with Sarking – A Step-by-Step Guide
At BRP Roofing, we specialize in expert tile roof reinstallation with premium sarking installation, ensuring your home remains fully weatherproof, energy-efficient, and long-lasting. If your roof is leaking, has poor insulation, or lacks sarking, our process guarantees a durable and structurally sound roofing system.
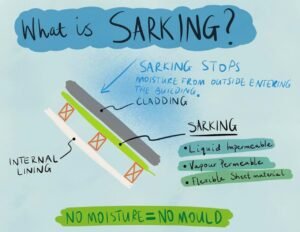
What is Roof Sarking?
Roof sarking is a protective, water-resistant membrane installed beneath roof tiles to provide additional protection against:
✔ Rainwater infiltration – Stops leaks if tiles shift or crack.
✔ Condensation buildup – Prevents moisture damage, reducing mold and rot.
✔ Heat loss and gain – Enhances insulation, keeping your home warmer in winter and cooler in summer.
✔ Dust and debris – Blocks fine particles and pests from entering the roof cavity.
Example: John’s Roof Problem in Melbourne
John, a homeowner in Melbourne, noticed water stains on his ceiling after heavy rain. Upon inspection, we found his 40-year-old tiled roof had no sarking. The tiles were cracked, and condensation was causing mold growth in the roof cavity. We recommended a full tile roof replacement with new sarking installation to restore his roof’s integrity.
Step-by-Step Process for Tile Roof Reinstallation with Sarking
Step 1: Roof Inspection & Assessment
✔ We conduct a detailed inspection of the existing roof, checking:
Tile Condition – Are they cracked, loose, or missing?
Batten Stability – Are the battens warped or rotting?
Timber Rafters – Are they structurally sound?
Flashing & Valleys – Are they properly sealed?
Ventilation – Is there proper airflow in the roof space?
✔ A detailed report and quote are provided, outlining the best materials for a long-lasting solution.
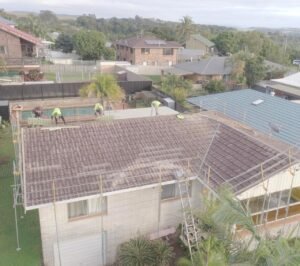
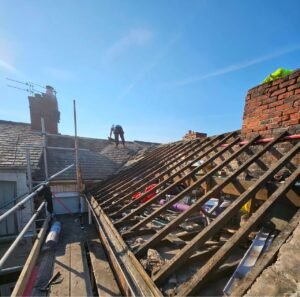
Step 2: Safe Removal of Old Tiles & Preparation
✔ All existing roof tiles are carefully removed and stacked to prevent damage.
✔ Battens are inspected – If they are rotting or warped, they are replaced.
✔ Timber rafters are checked – Any damaged rafters are reinforced.
Example: In John’s case, 30% of the timber battens were rotting, so we replaced them with new kiln-dried pine battens (measuring 38mm x 25mm) for extra durability.
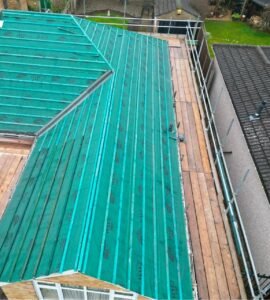
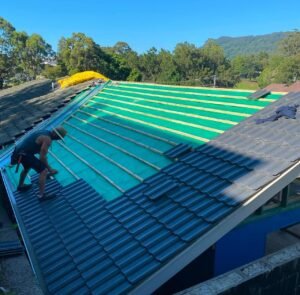
Step 3: Installing High-Quality Roof Sarking
3.1 Choosing the Right Sarking Material
✔ Reflective Foil Sarking – Helps reduce heat absorption, ideal for energy efficiency.
✔ Breathable Membrane Sarking – Allows moisture to escape while keeping water out.
✔ Sarking should comply with Australian Standards AS/NZS 4200.1 for maximum durability.
3.2 Measurement & Placement
✔ Sarking is cut to the correct width (typically 1350mm wide rolls).
✔ Overlapping edges by at least 150mm ensures a waterproof seal.
✔ Sarking is installed from bottom to top, overlapping like roof shingles to allow water runoff.
3.3 Securing Sarking to Battens
✔ The membrane is laid over the rafters and secured with roofing battens.
✔ Battens are fixed horizontally at 370mm to 450mm intervals, depending on the tile type.
✔ Sarking is stretched tight to prevent sagging, but a small gap is left for drainage.
Example: For John’s roof, we used premium breathable sarking, fixing it with galvanized nails and ensuring each sheet overlapped correctly. This would protect against Melbourne’s unpredictable weather.

Step 4: Installing New Battens (if required)
✔ Kiln-dried pine battens (38mm x 25mm or 50mm x 25mm) are used, depending on tile weight.
✔ Each batten is secured using 50mm or 65mm roofing screws for strong support.
✔ Spacing must match the tile profile, typically 370mm for flat tiles and 445mm for deep-profile tiles.
Example: Since John’s old battens were uneven, we realigned them, ensuring a smooth tile installation.
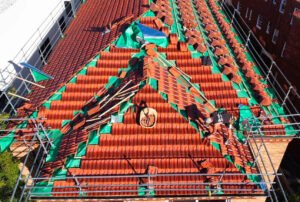
Step 5: Reinstalling the Roof Tiles
✔ Tiles are installed row by row, starting from the bottom edge.
✔ Each tile is interlocked and secured to prevent wind uplift.
✔ Fixing Method: Screws or clips are used on perimeter tiles for extra security.
✔ Ridge Capping & Repointing: Flexi-point mortar is applied to seal ridge caps and prevent leaks.
Example: John chose terracotta tiles for a modern look. We carefully aligned each tile, ensuring a professional finish.

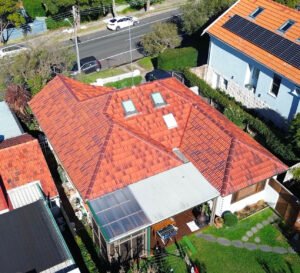
Step 6: Final Inspection & Clean-up
✔ A full leak test is conducted to ensure proper waterproofing.
✔ All gutters and downpipes are cleared of debris.
✔ Site is cleaned, and waste materials are disposed of responsibly.
✔ A final walkthrough is done with the client to guarantee satisfaction.
Key Benefits of Sarking Installation with a New Tiled Roof
✔ 100% Leak Protection – Acts as a secondary waterproofing layer.
✔ Stronger Roof Structure – Prevents tile movement and improves insulation.
✔ Energy Efficiency – Reflective sarking helps reduce cooling and heating costs.
✔ Better Fire Resistance – Complies with Australian BAL (Bushfire Attack Level) standards.
✔ Extended Roof Life – Protects timber framework from moisture damage.
Get in touch and let us know how we can help.
📍 89 High St, Kew, Melbourne, VIC
Send us a message
Have inquiries or seeking a quote for your roofing or repair project? Reach out to us – our team is ready to assist you!